Leftover Banana Cake

IMG_0836   
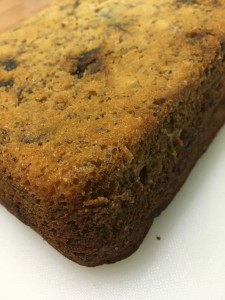
Bananas always look so irresistible to me at the markets. They’re cheap and tasty, and I always buy too many.

When they start to get too ripe to use, I pop them in little snap lock bags in the freezer. And when there’s too many in the freezer, I make this cake.

Quick, simple, tasty & less unhealthy than other similar cakes.

Ingredients

  • 1 cup self-raising flour
  • 2 tablespoons plain flour
  • ½ teaspoon bicarbonate of soda
  • ½ teaspoon ground nutmeg
  • 125g pitted dates, chopped
  • ⅓ cup chia seeds
  • ⅓ cup brown sugar
  • 2 eggs
  • ¾ cup Greek or Natural yoghurt
  • ½ cup milk
  • 3 or 4 very ripe bananas, mashed

IMG_0839Method

  1. Add the flours, bicarb, nutmeg, chopped dates, chia seeds and brown sugar to a bowl. Mix with a wooden spoon until evenly distributed.
  2. Whisk the eggs, add yoghurt, milk and bananas. Mix mix mix.
  3. Make a well in the dry mixture, add the wet mixture. Stir until it’s all gooey.
  4. Bake at 180°C for about 35 mins, then turn off the oven and leave for an hour.
  5. Eat! Nom Nom Nom.


IMG_0840

Categories: Dessert, Snacks | Leave a comment

South Carolina Inspired Pulled Turkey

Ingredients

  • 500g turkey breast
  • 3/4 cup cider vinegar
  • 5 tbsp mustard powder
  • 2 tsp Dijon mustard
  • 1/4 cup brown sugar
  • 2 tbsp fennel seeds
  • 1 tbsp caraway seeds
  • 1 tsp cumin seeds
  • 1 chipotle in adobo sauce
  • 2 tbsp smoked paprika
  • 1 tbsp brown sauce
  • 2 tbsp Frank’s hot sauce
  • 1/2 lemon, juiced
  • 5 drops Liquid smoke

Method

  1. Salt & pepper turkey, then brown turkey in pan.
  2. Mix all other ingredients together
  3. Add to pressure cooker
  4. Cook for 27 minutes
  5. Shred turkey, return to cooker and change to brown setting
  6. Reduce sauce
  7. Eat. Nom nom nom.
Categories: Mains | Leave a comment

Blood Orange Cake

This is an *epic* cake. It’s so damn tasty, and it’s gluten free so it will satisfy all your friends. Even those afraid of the South Park Gluten Free Ebola penis issue. (Lachlan, I’m looking at you!)

You don’t need to use blood oranges, that’s just what I had on hand when first working on the recipe. Also the coconut crunch can be substituted with almond meal, again, just what was in the pantry closely matching almond meal when I only had 200g.

Top this one with some candied orange slices and in addition to looking amazing you will also benefit from the extra caloric intake.

Ingredients

  • 2 blood oranges, washed
  • 200g caster sugar, plus extra for dusting
  • 5 duck eggs
  • 200g almond meal
  • 50g Banaban coconut crunch
  • 1 tsp baking powder
  • Rind of 2 more oranges

Method

  1. Bring a large pot of water to the boil. Wash the oranges and cook in the boiling water for 2 hours. Drain, allow to cool to room temperature, then puree. This step can be done ahead of time.
  2. Preheat the oven to 160°C. Grease and line a 22 cm spring form cake tin with baking paper. Beat the eggs and caster until well combined. Stir in the orange puree, orange rind, followed by the almond meal, coconut crunch and baking powder.
  3. Pour the batter into the prepared tin and dust the top with extra caster sugar. Bake for 1-1¼ hours, until the top is golden and a skewer inserted into the centre comes out clean.
  4. Allow to cool in the tin. Dust with icing sugar, cut into slices and serve.

John Lizzio

Categories: Dessert | Leave a comment

No Bake Lemon Cheesecake & Cumquat Jelly

This weekend I attended a wedding in a gorgeous little country town, Yungaburra. The wedding was at the groom’s parent’s house, which is a quintessential country Queenslander with views of green rolling hills.

It’s also our regional food bowl, and I was pretty excited when I found a heavily-laden cumquat tree in fully fruited glory. I wet myself with excitement when the Groom’s dad said that they don’t use them, and I should take as many as I want. So I practically picked off the whole tree.

To celebrate a friend’s Australian permanent residency I’ve made a lemon cheesecake. It’s a bit of a challenge to bake anything at the moment because our oven is busted and needs a nice electrician man to fix it. So, a no-bake lemon cheesecake it is. Oh, and I’ve got no biscuits, and my bra’s already off, so I’m not going out for biscuits. So I need to invent a new base too. Luckily for me, I found inspiration all over the place.

No Bake Lemon Cheesecake


No Biscuit Base

I was very pleased to find Jordans Muesli had a cheesecake recipe on their site. Since I can’t get their muesli in Australia, I just used what I had in the cupboard, but borrowed their proportions. Thanks Jordans!

  • 150g muesli
  • 100g butter, melted
  • 25g brown sugar

Base Method

  1. I blitzed up the muesli in the food processor until it was almost powdery, still had some chunky bits, and added the brown sugar and butter.
  2. Press it into the tin just like you normally would with any cheesebase base.
  3. Pop him into the fridge to get super firm.

Lemon No Bake Filling

I did loads of research into this bit, because I was really determined to have a gelatine-free cheesecake. My previous attempts at using gelatine in cheesecakes have been a disaster, with gluggy gelatine all thru the mix. I’ve become really scared of using it!

I found a couple of recipes that seemed very confident of the mixture thickening appropriately, but alas in their reviews loads of people also had trouble thickening. This recipe from Exclusively Food even had great photos along the method. So, it was gelatine time. In the end, the recipe I used was most similar to the Lemon Icebox Cheesecake from tastebook.

  • 250g cream cheese
  • 395g (1 can) sweetened condensed milk
  • ½ cup lemon juice
  • Rind of 1 lemon
  • 2½ tsp powdered gelatine

Lemon Filling Method

  1. Using my KitchenAid food mixer, I mixed the cream cheese until it was light and creamy. The same texture as if I was making cream cheese frosting. This took a fair while.
  2. Add the lemon rind, mix mix mix.
  3. Gradually add the sweetened condensed milk. Stir down the sides quite a bit during these 1st 2 steps.
  4. Sprinkle the gelatine on the lemon juice, and wait for 5 minutes for it all to be wet and spongy.
  5. Sit the container with the lemon juice in a bowl of boiling water to dissolve all the gelatine. I used a pyrex jug for the lemon juice to make this a bit easier. You don’t want to get the lemon juice too hot at this stage. Be especially careful to make sure you have no chunky bits of gelatine.
  6. Add all the lemon juice/gelatine mix to the mixer, and mix really well. The mix should thicken a bit.
  7. Pour into your chilled base, and return to the fridge.

Cumquat Jelly

I had heaps of trouble finding a recipe for this. Most recipes want you to make a jelly like you would make a jam, so finding something which was set firm with gelatine was a real struggle. Eventually I found Cross Creek Cookery. A zany and quirky book of Southern American cuisine written in the 1940s. Thankfully they came to the rescue with their kumquat jelly recipe. Incidentally if you want to know how to cook bear or alligator, you should buy the book!

  • 4 cups cumquats, sliced
  • ½ cup sugar
  • 125ml Sauternes, or some other sweet white wine
  • 40ml orange liqueur
  • 1 tbsp powdered gelatine
  • 2 tbsp cold water
  • A few grains salt

Adventurous Jelly Mould

Jelly Method

  1. Put all your sliced cumquats in a saucepan, and cover with some water.
  2. Bring slowly up to the boil, and simmer for 30 minutes.
  3. Drain your cumquats, and push the refuse through your sieve to extract more flavour and juice. You want to end up with 1½ cups cumquat juice.
  4. Sprinkle the gelatine over the cold water. Let sit overnight allow the gelatine to swell up.
  5. Return the juice back to the saucepan, add sugar, wine and liqueur. Heat until almost boiling.
  6. Add the gelatine mixture, and the salt. Stir until fully dissolved.
  7. Cool for about 1 hour, and slowly pour some of the mixture over your chilled cheesecake. I poured over the back of a spoon just to make extra sure that I didn’t melt the layer below.

You’ll have a fair bit of jelly left over. Pop into some jelly moulds, or some glasses and have on their own. It’s an amazingly sweet and tart jelly!  I did find this wicked looking jelly mould, it would work great.

Here’s the cheesecake from the top!

Cumquat jelly

Categories: Dessert | Leave a comment

Lasagne non Autentico

Lasagna is a massive ordeal in our home. It’s definitely a gift for slow food fans with each piece of the lasagne puzzle researched and perfected over the years. There’s a little experimentation with every new edition, and long chats of how we might improve it for next time. Typically experimentation involves trying to keep the damn thing intact when we get it out of the pan, and also new interesting layers. Here’s the current incarnation.

Ragu Ingredients

  • 14 cloves garlic (muhaha, seems severe huh!)
  • 3 small onions
  • 4 stalks celery
  • 3 small carrots
  • 1 Spanish chorizo
  • 150g shortcut bacon
  • 500g pork mince
  • 500g veal mince
  • 800g can tomatoes
  • 1 cup red wine
  • 1 cup milk
  • 400ml water
  • 250g tomato paste
  • ¼ cup thyme, stripped off the stem

Ragu Method

  1. Add garlic to food processor. Blitz until it sticks to the sides.
  2. Add onions to food processor. Blitz until chopped but not too juicy.
  3. Heat oil, add onion and garlic on a low heat. We want to make them sweat. Sweat til they can’t sweat no more.
  4. Chop carrots roughly. Add one rough bit at a time to the food processor until super finely chopped.
  5. Add celery to processor. Blitz until finely chopped and getting juicy.
  6. Add carrot/celery mixture to onions in the pan. Gently fry until all vege are translucent and start giving off some liquid.
  7. Chop chorizo roughly, but smallish. Add to food processor one bit at a time. These give the processor a lot of hard work to do, so so slow with them. Add bacon. Process both until they look like mince.
  8. Add chorizo/bacon mince to the pan. Stir it around a bit and let the fat render out of the chorizo for about 5 mins. Mmmm, flavour.
  9. Add pork and veal mince to the pan. Get some colour onto the mince, and let cook for 10 minutes. Break up any lumpy looking meat bits.
  10. Add milk, cook for 5 more mins.
  11. Add canned tomato, tomato paste, water and wine. Stir, stir, stir. Get all the meat making liquid kisses.
  12. Add thyme. Stir, put the lid on, sit down for a bit.

Ricotta Mixture Ingredients

  • 1kg ricotta
  • ¼ basil leaves, chopped
  • ½ flat leaf parsely, chopped
  • Rind of 1 lemon
  • 2 eggs
  • Salt
  • Pepper

Ricotta Mixture Method

  1. Add all ingredients to a bowl.
  2. Stir well to break up the ricotta.

Bechamel Sauce Ingredients

  • 1 small onion
  • 6 cloves
  • 1 bay leaf
  • 750ml (3 cups) milk
  • 50g unsalted butter
  • ⅓ cup plain flour
  • 1½ cups grated parmesan
  • 2 tsp dijon mustard
  • ½ white pepper


Bechamel Sauce Method

  1. Stud the onion with the cloves. Add it, and the bay leaves to a saucepan of milk.
  2. Bring milk to the boil, then set aside for flavours to infuse.
  3. Melt butter in a pan. Add flour and cook for 2-3 minutes it starts to bubble and looks a bit like honeycomb.
  4. Add milk slowly, a ladleful at a time, stirring after each ladleful is added and the sauce is smooth.
  5. Add mustard, white pepper and nutmeg.
  6. Remove from the heat and stir in the cheeses. It’s now really yummy.

Assemble

Categories: Mains | Leave a comment

Sweet Potato Pie

Photo Courtesy Beverly & PackI’ve always wanted to go to the USA for their 4th of July celebrations. All countries have a magical air about them on their national day, and the USA isn’t the only country I’d love to visit during their special celebrations.

At home we often cook a country’s cuisine on their national day, so Independance Day is just another reason to try to cook interesting foods, and evaluate which cuisines we like.

For 4th July we opted for gourmet hot dogs, which many would turn their nose up at, but these were no ordinary dogs. Then to finish off the meal, we baked a sweet potato pie.

Here’s (loosely) the recipe.


Sweet Shortcrust Pastry

I’m in morbid fear of pastry. I usually get very angry at it because it’s troublesome. In light of this, I followed the Masterchef recipe.

Sweet Potato Filling

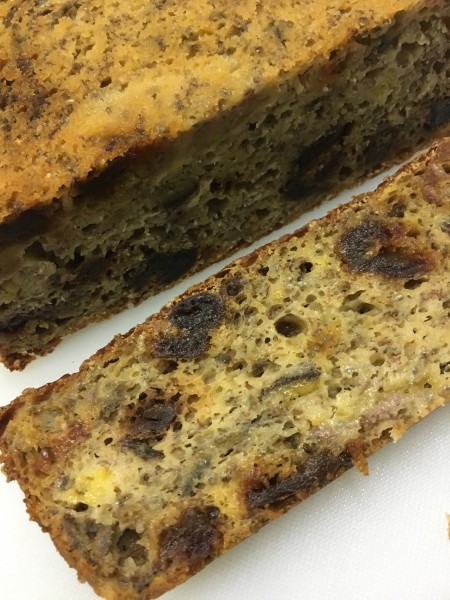
The filling recipe is mostly courtesy Oprah, but I did modify her version quite a bit in the spices end. This is a US version, so the weights are not metric, and the cup sizes are different to that in Australia.

  • 1 pound (2 medium) sweet potatoes, baked and peeled
  • 1 cup packed dark brown sugar
  • 1½ tsp. ground cinnamon
  • ½ tsp. ground cloves
  • 1 tsp. ground allspice
  • 1¼ tsp. ground nutmeg
  • 2 tsp. ground ginger
  • 1 tsp. salt
  • 4 eggs
  • 1 cup heavy cream
  • ¼ cup (½ stick) butter, melted and cooled slightly

Directions

Preheat oven to 350°F.

In a food processor fitted with a metal blade, puree sweet potatoes.

In a bowl, mix together brown sugar, cinnamon, allspice, nutmeg, and salt, breaking up any lumps.

In another bowl, whisk together eggs and cream.

Add spice/sugar mix to the pureed sweet potatoes, pulse until combined.

Add egg and cream mixture, pulse till combined, then pulse in melted butter.

Spoon filling into par-baked pie crust and flatten out the top. Bake for 30-45 minutes, until filling is set in the center.

Eat. It’s so yum!

Categories: Dessert | Leave a comment

Spectacular Rainbow Cake

This week one of my friends is heading into surgery for a double mastectomy, and she’s really fond of rainbows. So fond, in fact, she has a Pinterest board dedicated to them. A few friends decided we’d throw her a rainbow party to cheer her up prior to the surgery.

She had expressed interest in having me bake a rainbow cake, and we ooed and aahhhed over photos of them together. She was really fond of this one from the Omnomicon blog:

We also really loved the look of the ‘sunshine in a jar’ rainbow cake on The Family Kitchen food blog:

Armed with this inspiration, I set off looking for the necessary Wilton Color Gels that I’d wanted for *years*. I only had a few days, and I knew that the supermarket liquid colour just wouldn’t be intense enough to colour the cake batter.

I heard on the grapevine that Spotlight stocks Wilton products, but was very disappointed after the grumpy and unhelpful sales staff said that they have ‘a box out the back somewhere‘ and ‘give me a week to see if I can find it‘. I only had 4 days.

Being in Cairns has lots of drawbacks when it comes to tricky products. Things take a few days to get posted here, and boutique specialist shops are thin on the ground. Luckily, I discovered Baking and Catering Services who were *amazing*. Their knowledge was incredible, and they were so helpful. I can’t recommend them enough. I bought the 8 pack of icing gels I was seeking, and a couple extra so I was sure of the colours in my rainbow cake.

As I was searching around, I discovered an amazing rainbow layer cake on Martha Stewart’s website, and the moment I saw it I just knew this would be the one I would make. It’s so much more elegant than the marbled style above, but the frosting quantity did horrify me a bit.

I decided I didn’t want to use a boring white buttercake and found a great-looking recipe from the Tender Crumb blog. I was really concerned about having  tight cake crumb, as I didn’t want the cake to break into lots of crummy bits as I was cutting it.

I also loved the look of the cream cheese frosting with that recipe, and so used that as well.

We took the batter, and divided it into 6 portions. While I had every intention of making a rainbow-correct 7 layer cake, I decided indigo is not a very attractive food colour, and dropped it. This also made the baking a bit easier, as I had 3 round tins, and only had to bake twice.

Here’s the batter divided up, freshly coloured:

and… the final cake:

Categories: Dessert, Party Food | Leave a comment

Birthday Cake

It’s not uncommon that I would bake my own birthday cake. While it seems sad, it really is a great time to experiment with new technique because if it goes wrong you’re not stuffing up someone else’s birthday! Here’s what I came up with for the year 33.

Ingredients

  • 1 mango
  • 1 really ripe large banana
  • 250g almond meal
  • ½ cup brown sugar
  • ½ cup macadamia nuts, chopped
  • 3 eggs
  • ¼ cup coconut oil
  • 3 tsp vanilla paste
  • 2 tsp baking powder
  • ½ cup extra chopped mango

Method

  1. Add mango flesh, banana, sugar, vanilla paste, oil and eggs to a food processor. Blitz until really well combined. Try to make sure there are no more fruit chunks.
  2. Add almond meal and baking powder. Blitz until just combined. Don’t overdo it here.
  3. Stir thru macadamia nuts and chopped mango.
  4. Bake in a round springform pan for 45-50 minutes at 180C.


Categories: Dessert | Leave a comment

Wild Ginger Shortbread

Ginger is an ingredient I absolutely love; the warmth, the kick and the floral notes it adds to dishes makes it a favourite of mine. So this week when I spotted a new stem ginger product at Jonsson’s Farm Market made in Cairns I was really excited to give it a test run.

I have previously used stem ginger from Buderim after finding it gleefully in chef pack quantities while I was touring their factory.

Wild Ginger vs. Buderim

The local product from Wild Ginger is simply named Ginger in Syrup. The ingredients are also really simple; ginger, sugar, water. It has a lot more bite when compared with Buderim’s, and I suspect Buderim boil their ginger in the syrup for quite some time to produce a sweeter stem.

Amateur Shortbread

When I was fairly new to cooking to stuffed up a batch of shortbread and my partner has never let me forget it. I halved the quantity of butter, and I made some inedible rock-like formation.

I was really keen to turn out some quality shortbread and (hopefully) redeem myself.

Wild Ginger Shortbread Recipe

Ingredients

225g plain flour
2 tsp ground ginger
75g caster sugar
2 tsp stem ginger, finely chopped
175g butter

Method

1. Sift together the flour and ground ginger into a bowl.
2. Stir in the caster sugar and chopped stem ginger.
3. Rub in the butter until the mix starts to stick together.
4. Press with a palette knife into a tin so it’s about 1cm all over, and smooth on top. I used a 28cm x 18cm rectangular tin.
5. Bake at 180C for 40mins, or until the biscuit is slightly browned.

Optional Delicious Topping

Ingredients

1 tbsp golden syrup
50g butter
4 tbsp icing sugar, sifted
1.5 tsp ground ginger

Method

  1. Heat syrup and butter together until melted.
  2. Stir in the icing sugar and ginger.
  3. Top the biscuits while still warm from the oven.

The biscuits were a great success. Next time I’ll make a double batch.

I must try to get my hands on a chef’s size pack of Wild Ginger’s Ginger in Syrup.

20120103-213555.jpg

20120103-213619.jpg

Categories: Snacks | Tags: , , | Leave a comment

Huevos Rancheros

This is not an authentic recipe — but then I get the feeling there is no authentic recipe; everybody has their own take on it.

So this is simply how we do it in our house!

For those who are staring aghast at the store-brought canned refried beans, et al, let me explain that Huevos Rancheros in our house is a fast dish, so we use ingredients we have at hand — I’ve never thought the day before, “I’m going to cook huevos tomorrow!”, and promptly start cooking down some beans and preparing masa mix for tortillas!

Ingredients

  • Onion
  • Garlic
  • Bacon (optional)
  • Chorizo (optional)
  • Potatoes
  • Stock or similar (optional) — for the one pictured, I used chicken stock and leftover turkey gravy
  • Paprika
  • Cumin (optional)
  • Canned tomatoes (or fresh)
  • Tomato paste
  • Tomatillos (optional)
  • Refried beans / Frijoles refritos
  • Beans (I used chilli-flavoured kidney beans)
  • Chillis (I prefer chipotles for that lovely smokey flavour)
  • Jalapeños
  • Hot sauce (we like Frank’s, but Tabasco would do)
  • Coriander (optional, to serve)
  • Tortillas (stale ones are okay!)
  • Eggs (one per person)
  • Cheese, grated

Huevos Rancheros ingredients

Method

Just chop it so it suits and throw it all in, except for the coriander, jalapeños, refried beans, eggs, cheese and tortillas.

When the mix is flavoursome, crack open some eggs on top, and add a lid. To speed things up I often transfer the pan to sit under the grill for a minute or two. Sprinkle grated cheese. Garnish with coriander, jalapeños, refried beans and Frank’s; let people load the goop on top of their tortillas.

Tips:

  • The first ingredients should build a flavour base, so I’d typically cook the onions, garlic, bacon and chorizos; then deglaze by pouring in a liquid such as some tomatillo juice, stock, or a vinegar.
  • When cooking with cumin, dry-fry it first (toss in a pan, no oil, and heat until you can smell it — don’t burn it! — then grind.)
  • If using canned refried beans, heat in a saucepan with some water, or (as I tend to do,) something more flavoursome such as the liquid from the tomatillos


Categories: Breakfast | Leave a comment